
Creating a Player
Introduction
In MixFlip, a “Player” is a playlist of songs that you embed in one particular spot on your website. Even if you’re only trying to show the “before and after” of one song, you can still create a player and add the song to it.
Every song in MixFlip can have before/after audio (for MixFlip players) and/or classic audio (for Classic players). The player type determines which audio is used:
- MixFlip players show songs that have both before and after audio uploaded.
- Classic players show songs that have classic audio uploaded.
The same song can appear in both player types if it has the required audio files.
Creating a Player
To create a player, click on the “Players” tab in the MixFlip dashboard and click on the “New Player” button in the top right.
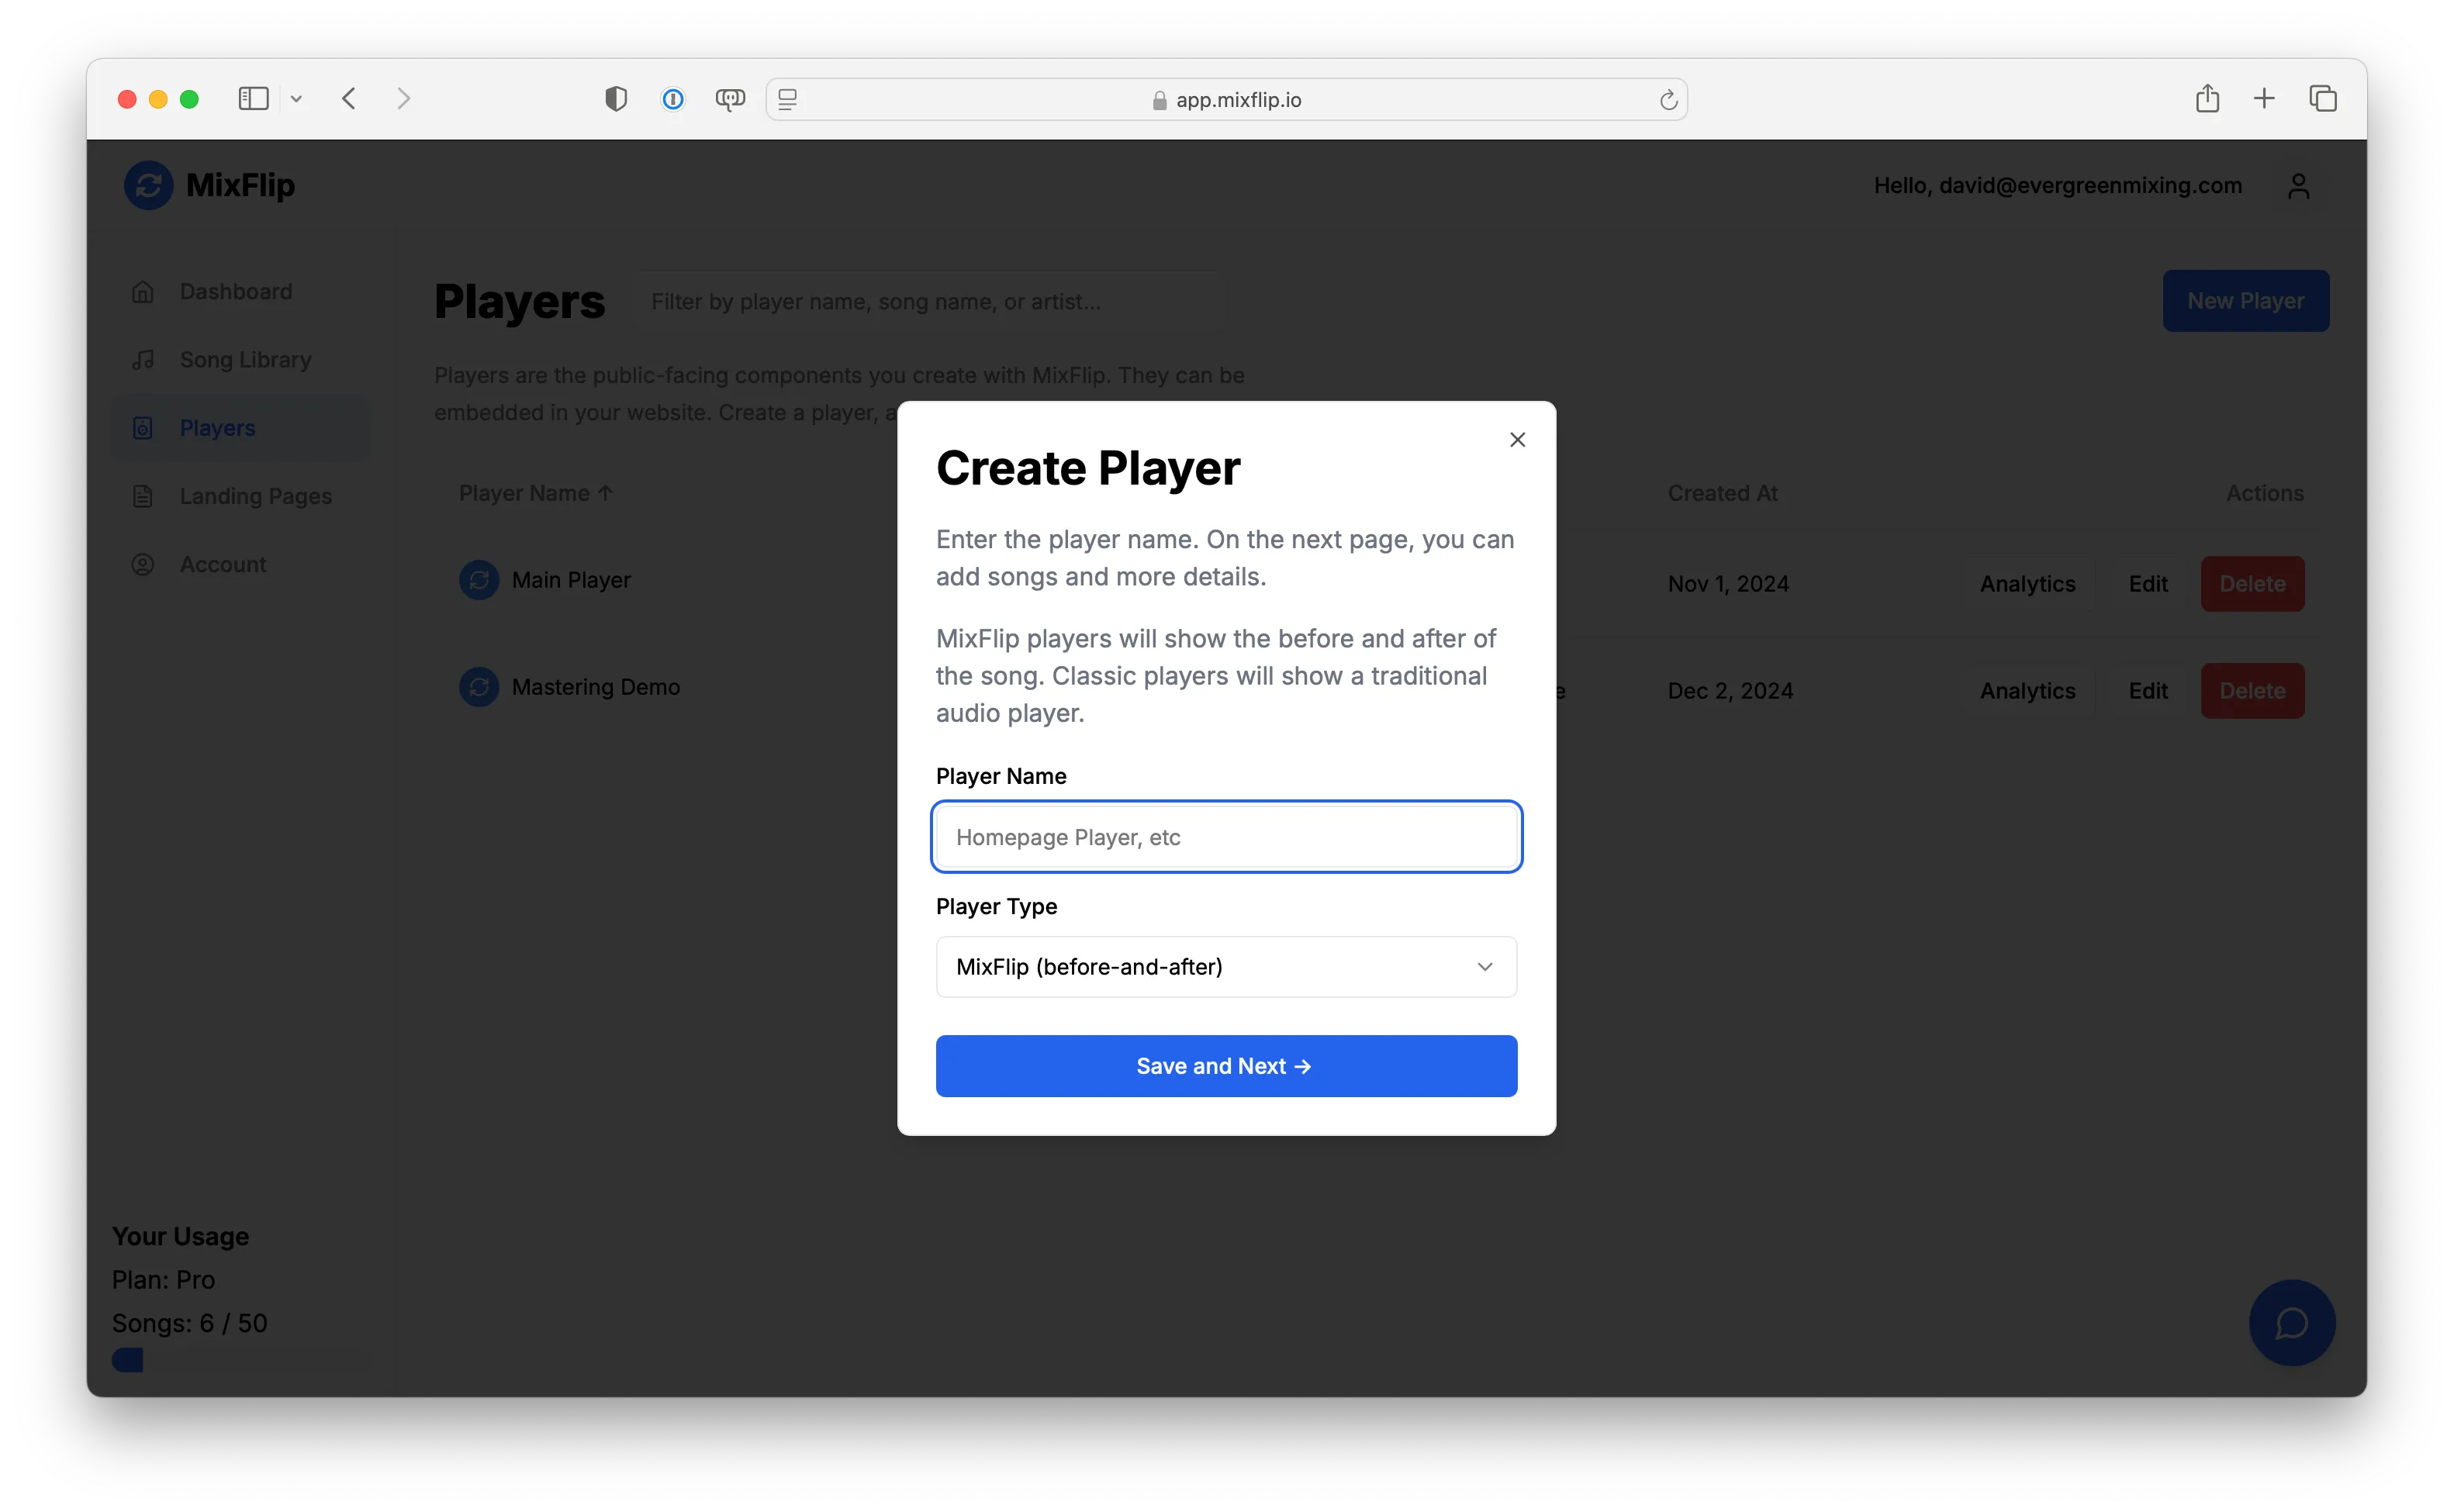
This will open up a dialog where you enter the name of the player and choose whether it should be a MixFlip or Classic player. MixFlip players use the before and after files you’ve uploaded for each song, while Classic players use the classic audio you’ve uploaded for each song.
When you’re ready, click “Save and Next”.
Adding Player Content
Adding Songs
After you’ve created the player’s record in the database, you’ll be redirected to the player’s edit page.
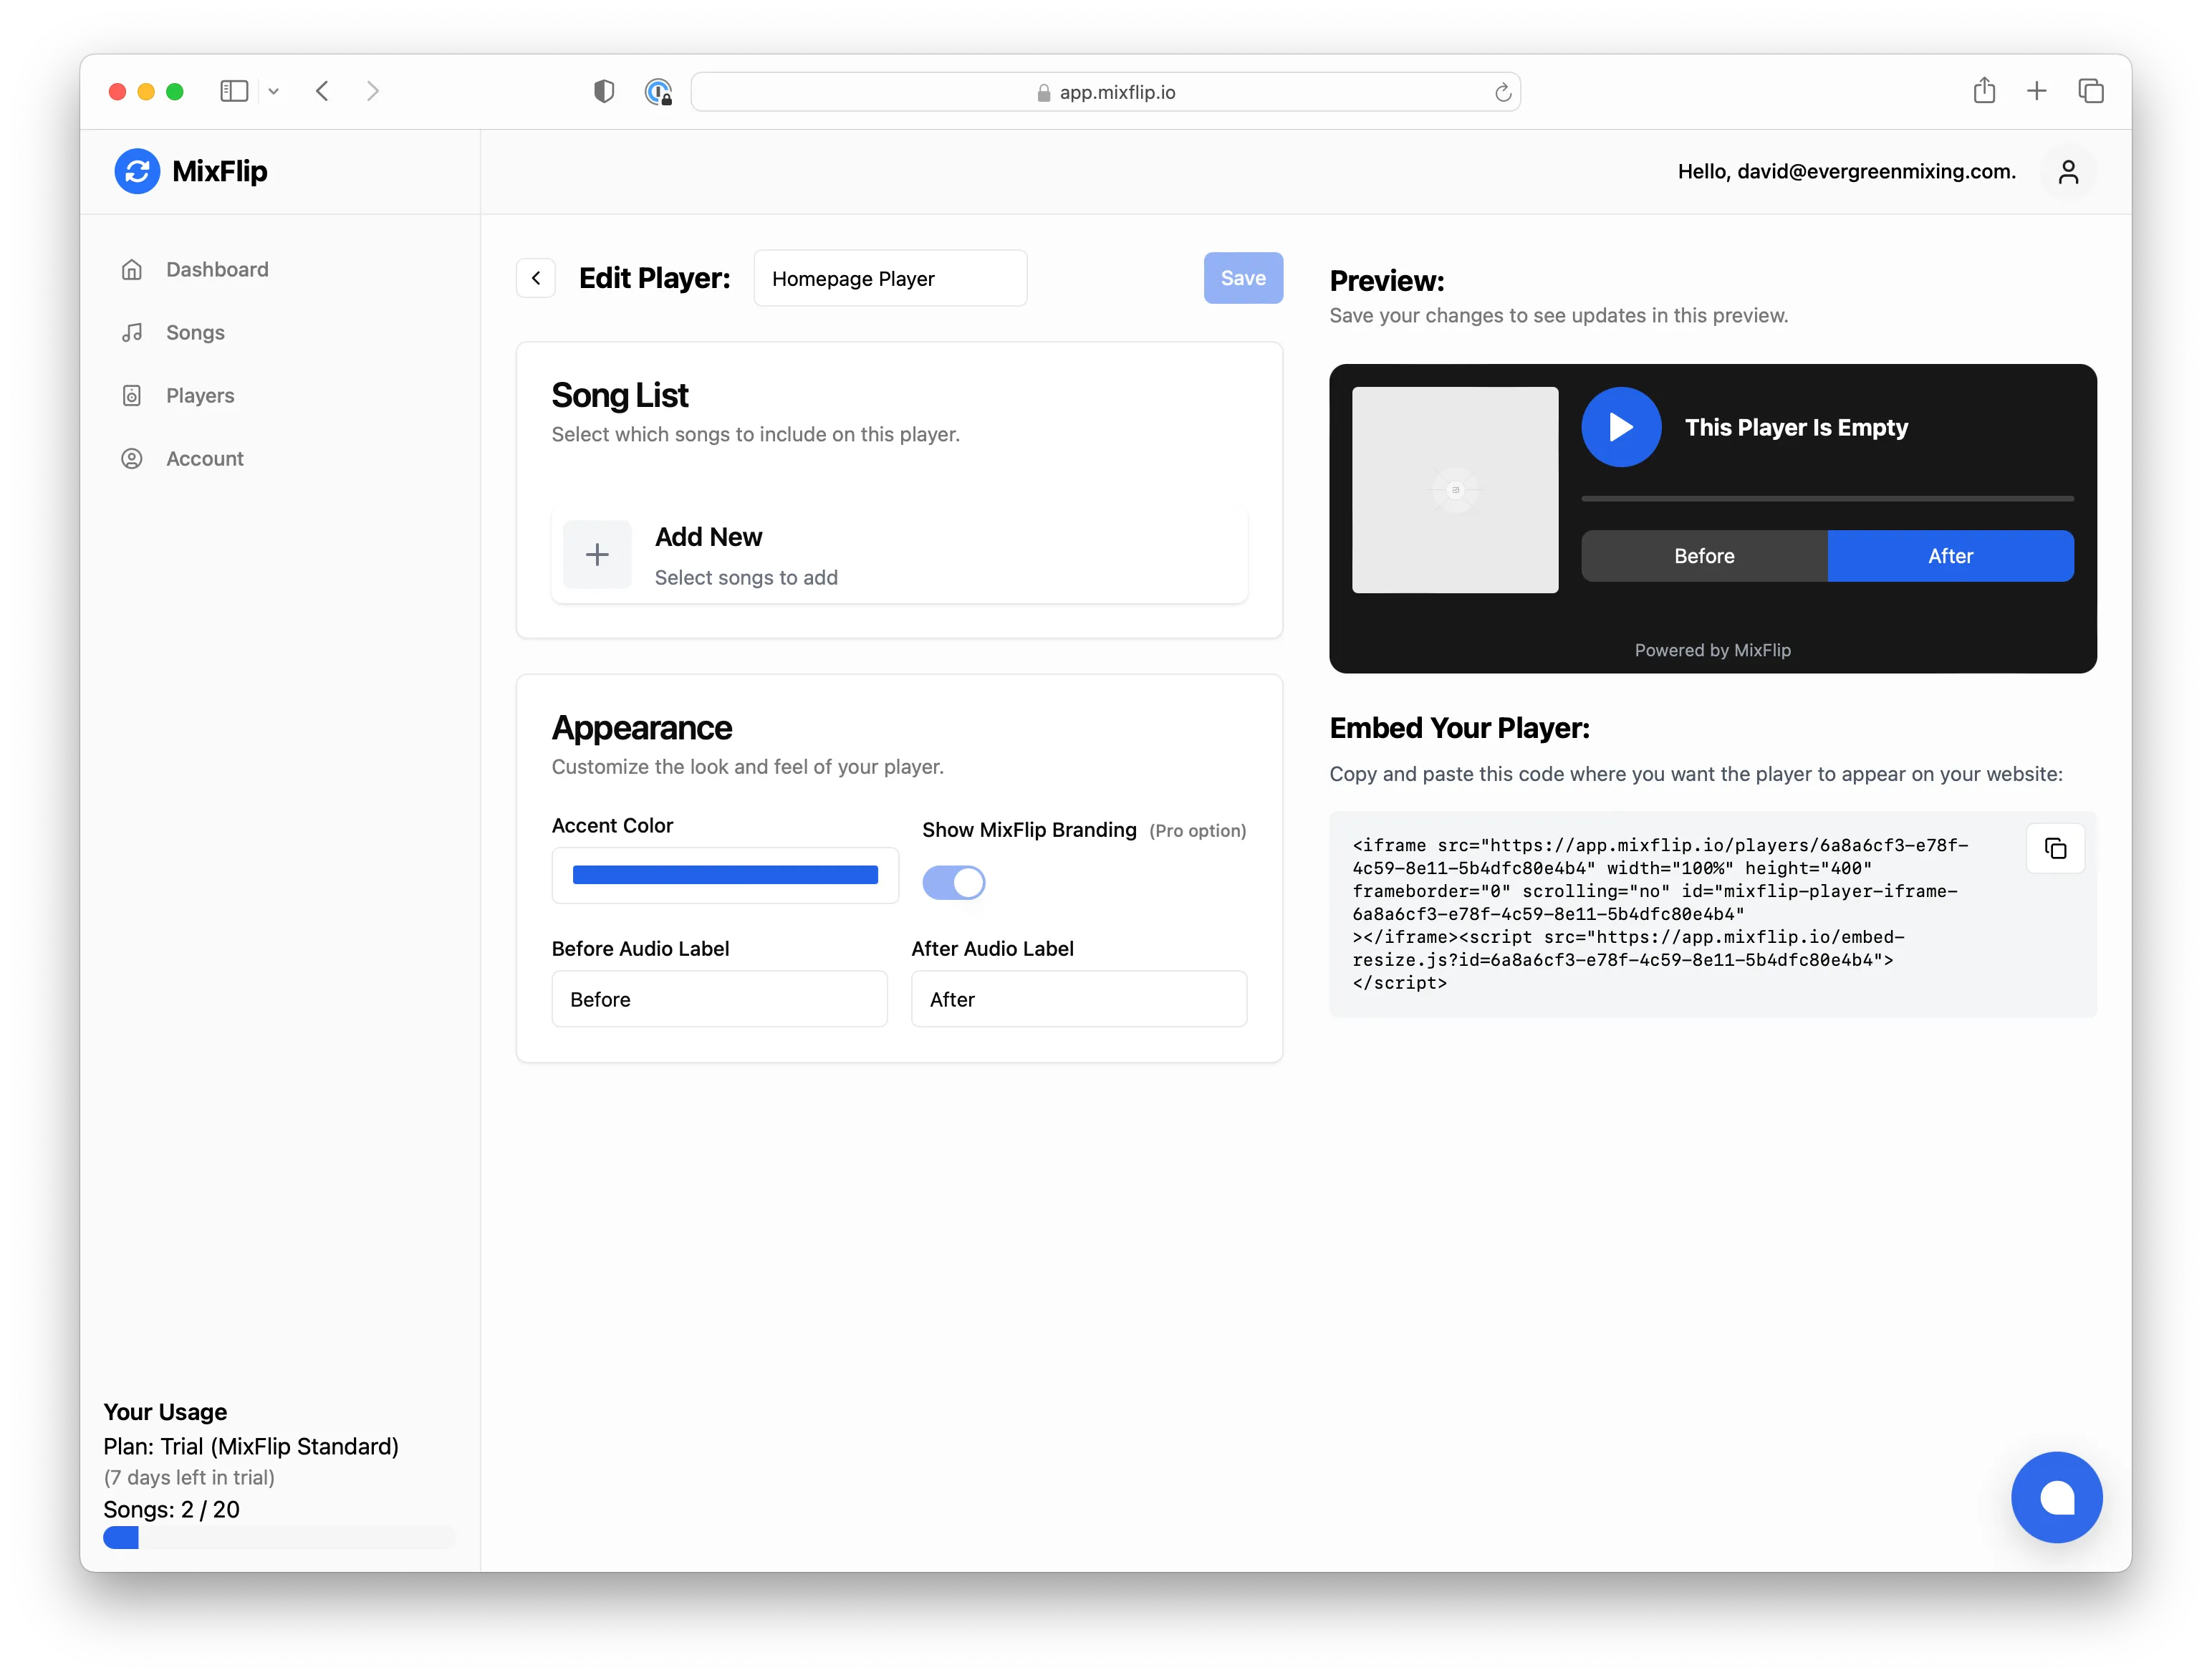
As you can see, the player is empty. We need to add some songs to the player. To do this, click the plus icon in the “Add New” card.
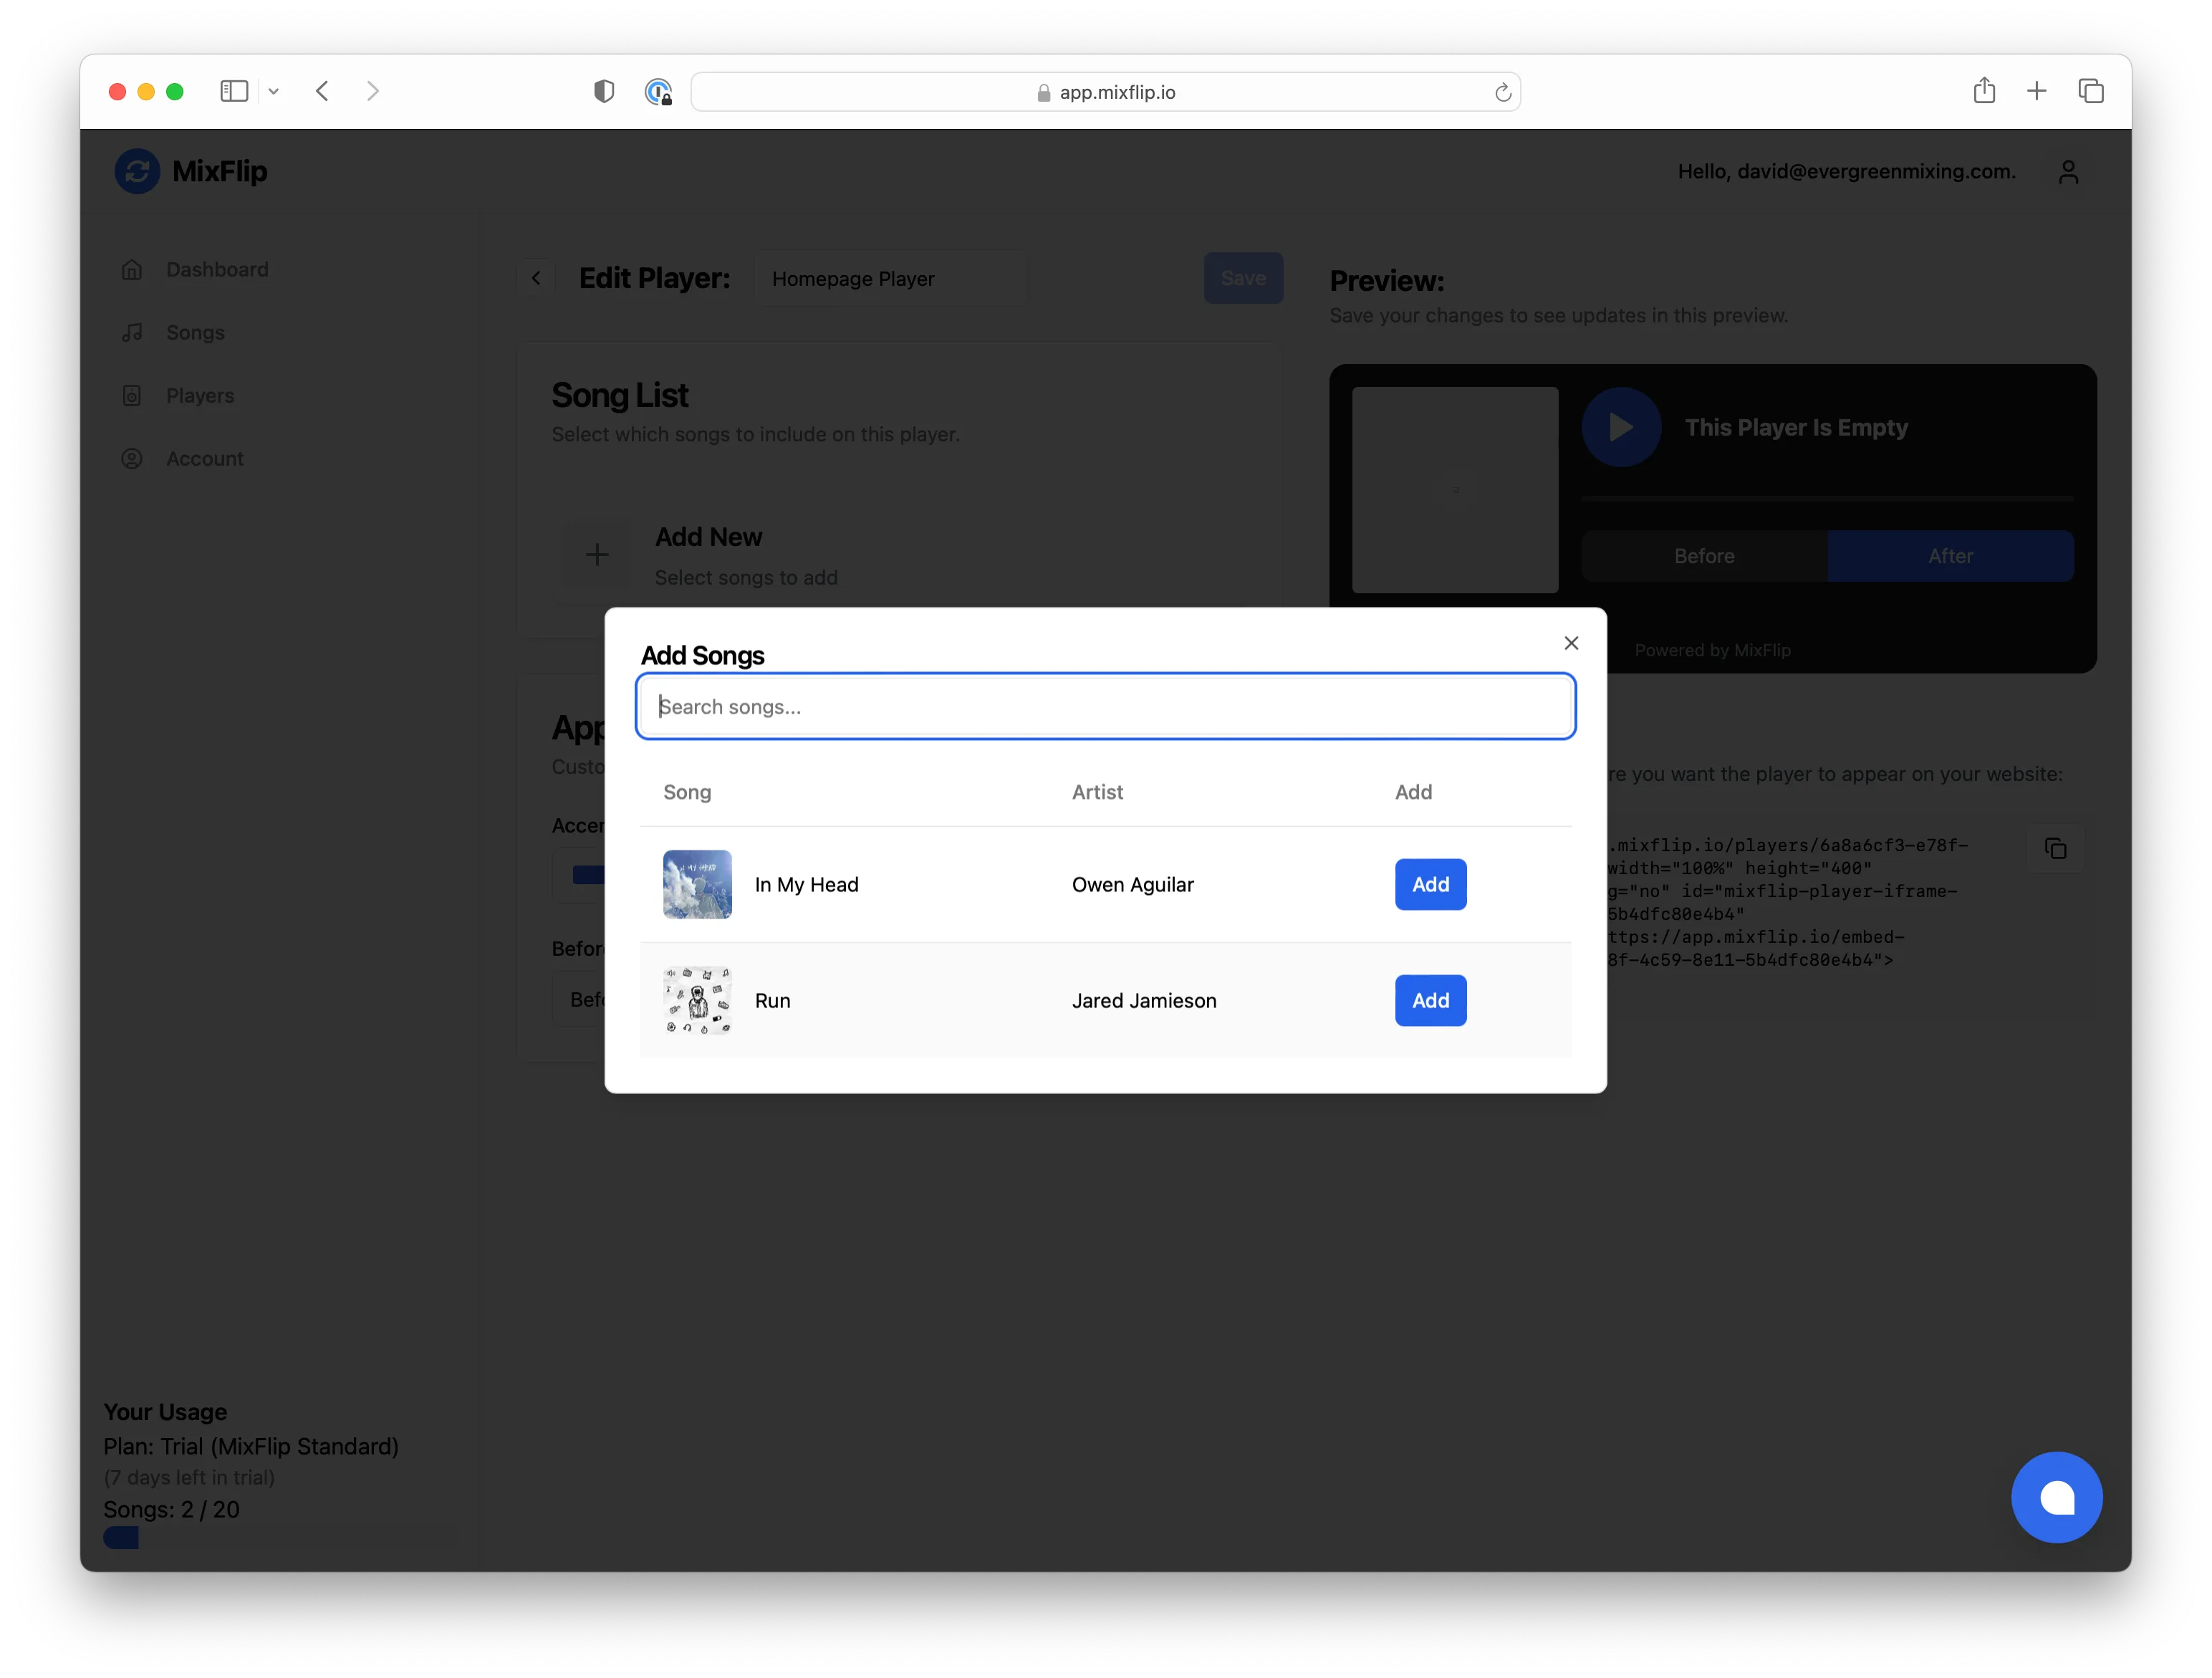
This will open up a dialog where you can select the songs you want to add to the player. You can also search for songs by song name or artist.
Songs with Missing Required Audio
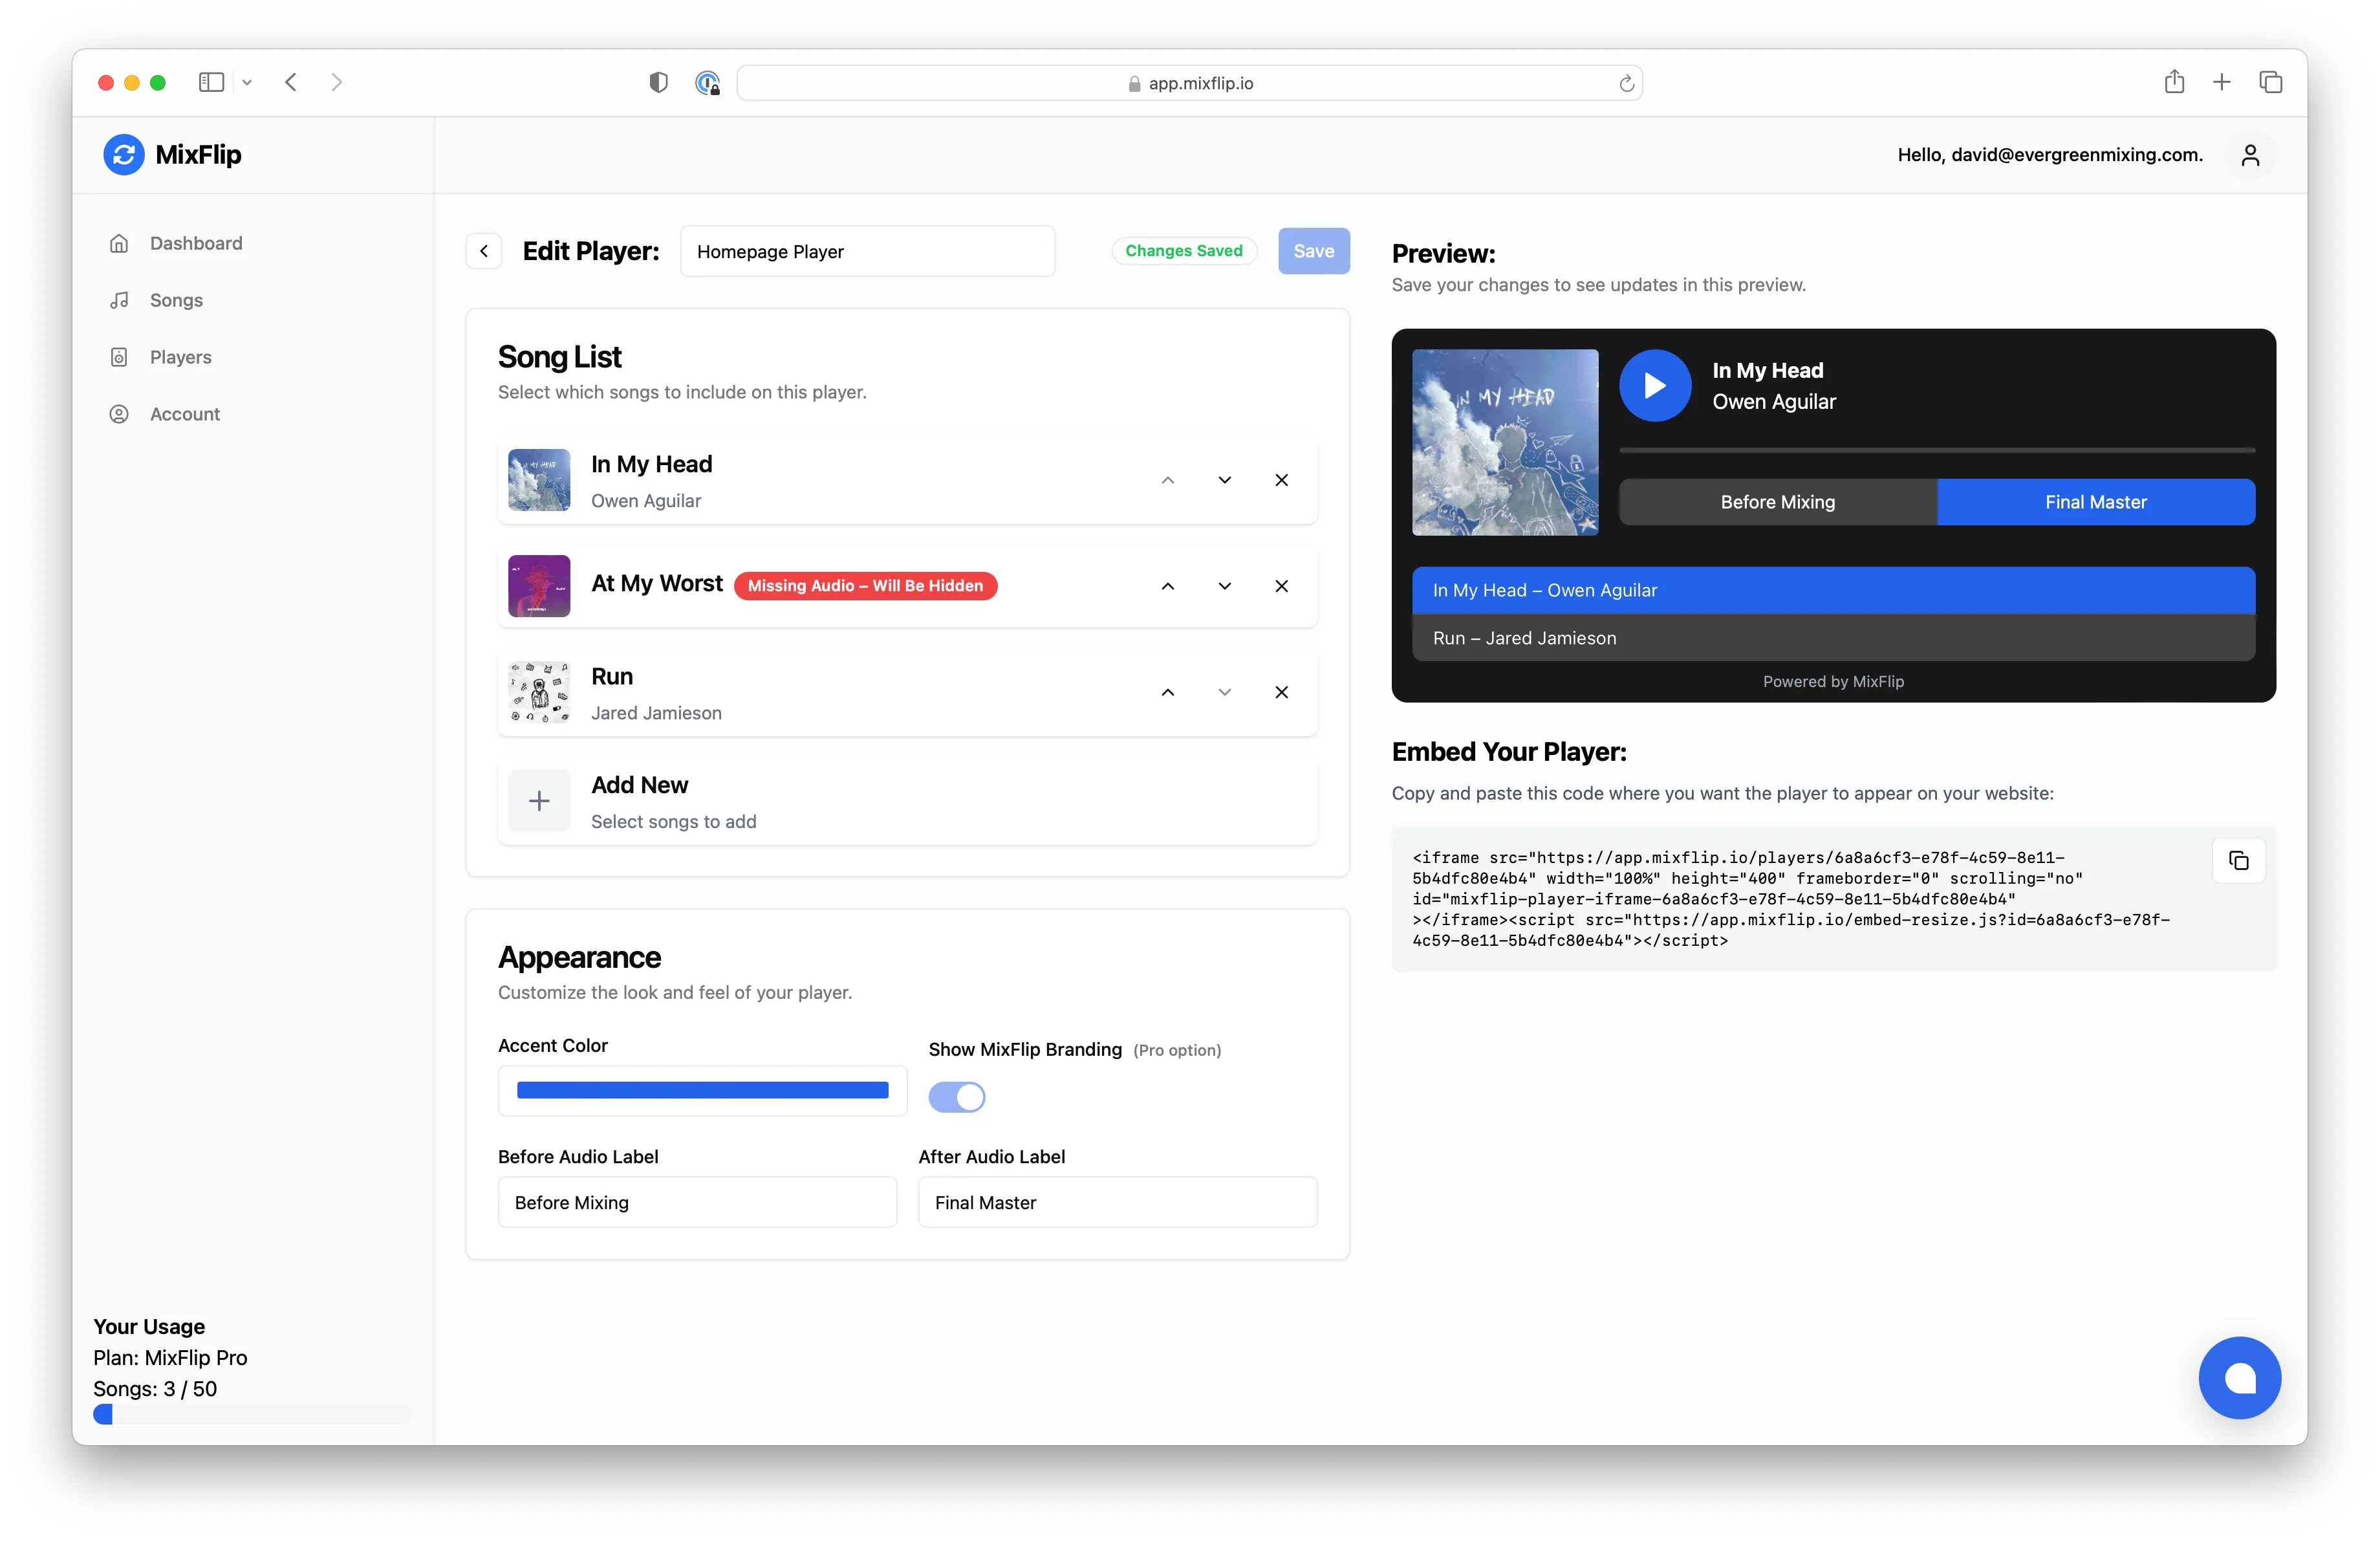
- MixFlip players: Songs require both a before and after audio file to be displayed. If a song is missing either, you’ll see a message in the dialog. You can still add it to the playlist, but it won’t be displayed in the player until the missing audio is uploaded.
- Classic players: Songs require a classic audio file to be displayed. If a song is missing classic audio, you’ll see a message in the dialog. You can still add it, but it won’t be displayed until the classic audio is uploaded.
This allows you to build your playlist in advance and fill in missing audio later.
Changing the Order of Songs
You can change the order of the songs in the player by dragging and dropping them in the playlist.
Customizing the Player Appearance
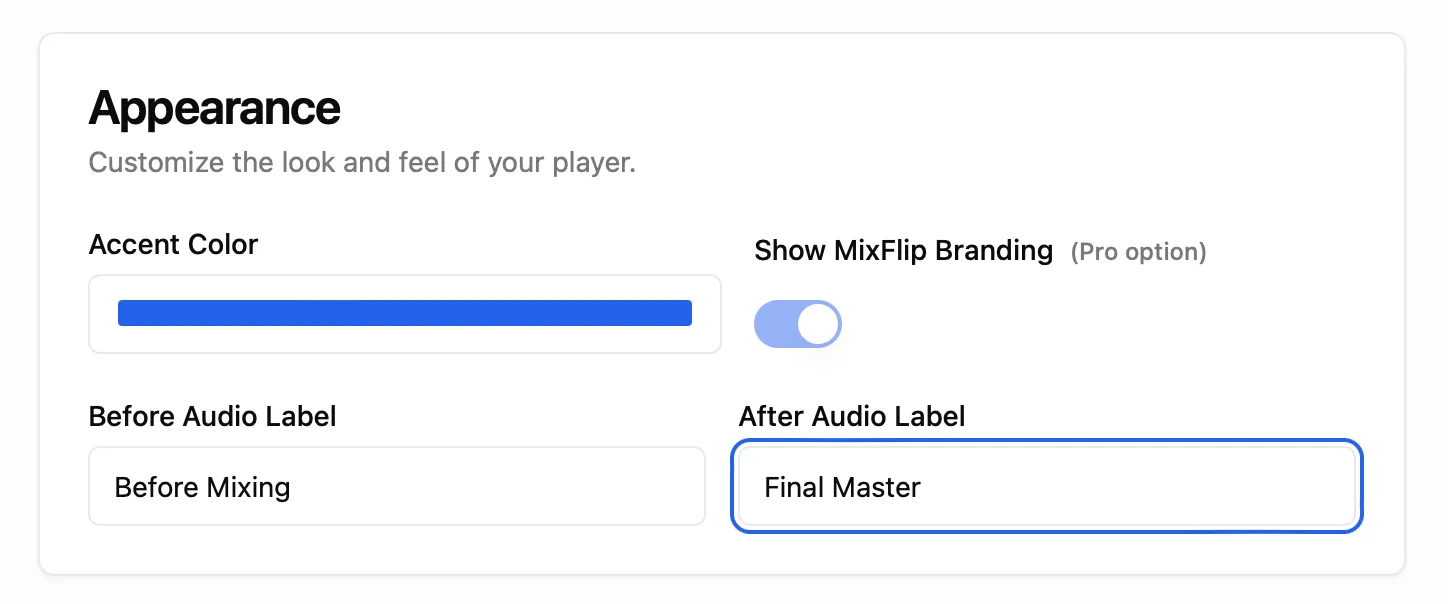
The player’s appearance can be customized in the appearance settings card. You can adjust:
- Accent color, background, and other color options
- Fonts
- Layout and display of song information (header and playlist)
- Album artwork display (desktop and mobile)
- Playlist display options
- MixFlip branding (Pro plans only)
- Custom labels for before and after audio (MixFlip players)
Custom Before and After Audio Labels
How you label the before and after audio is up to you. If you provide mixing services, you might want to call them “Before Mixing” and “After Mixing”. If you’re providing mastering services, you might want to call them “Before Mastering” and “After Mastering”. If you’re a producer, you could call them “Demo Bounce” and “Final Master” – it’s up to you!
Associated Landing Pages
You can see which landing pages use this player and jump to edit them directly from the player editor.
Adding a Player to Your Website
Once you’re happy with your player, you can add it to your website. To do this, just copy the player’s embed code from the player’s edit page and paste it into your website builder.
In most website builders, you add a block or widget called “html” or “custom code” and paste the embed code into it. Sometimes website builders won’t preview external scripts, so you may have to save the code to your website page and view it in the live version of your website.